Thursday, October 31, 2013

Bonus Halloween Page!

Wow I can't believe it is Halloween already! This is a really last minute post because at first I was planning to do a Halloween page, then I changed my mind, then I decided that I still wanted to do it.... As a result of my indecisiveness page 10 is only half a page. Sorry!

So please download page 10 for FREE:
http://www.teacherspayteachers.com/Product/Little-Big-Moments-Page-10-Printable-953512
Note: I did change the color scheme for this page so it would look Halloween-ish. (But it's still cute right?)
I hope to be posting my completed page 10 soon! Thanks for all your patience!

As a reminder...
Shutterfly has 101 FREE 4x6 prints.
(you just pay the cost of shipping)
Use promo code: SPOOKY
This offer is good until tomorrow (Nov. 1) so don't forget!

Hope you all have a fun and safe Halloween!

Thursday, October 24, 2013

Little Big Moments #4

Sorry these pages took so long! I had to make some design changes to get the embellishment sizes just right. These pages are so fun to create because it contains actual "page-thickening" elements that makes a smash book a smash book!

Here are pages 8 and 9:

Title: Sky's the limit
Theme/Prompt: Measure your height
Additional Materials: Bakers twine (can use yarn or ribbon), 4 brads 
To Create: 
step 1. Download printables
step 2. Cut embellishments out
step 3. Design/decorate pages
step 4. Add journaling & photos (optional)
step 5. Tape/glue

*Notes:
  • These two pages are designed to document you and your child's height using string. 
  • I also wrote down our heights on the journaling card.
  • I chose to wrap my twine so it wouldn't get tangled.
  • I used the clouds to hide my baker' twine. 
  • Make sure to print the hot air balloons on card stock so they are studier. 
  • You can choose to wrap the string around the hot air balloon if you don't have brads. Just glue the clouds leaving the top open to create a pocket for your hot air balloon.

Height Keepsake Instructions:
  • Cut out hot air balloon and clouds.
  • Fold hot air balloon in half.
  • Glue one end of twine to the hot air balloon, then glue the folded balloon together.
It should look like this

  • Measure and mark height with the twine or ribbon.
(Try not to stretch the string by pulling too hard.)


  • Using a brad create 2 holes at each end of the cloud.
  • Tie a small loop at the other end of the string.
  • Place the string loop on one brad so that the string is attached to the cloud.
  • Secure the brads onto your page by opening the two prongs in the back.
  • Then all you need to do is wrap your string around the two brads.

To see how much your child is growing, simply unwind the twine.
Finished!

Here is what my pages look like
 

I used the small banner embellishments to label the strings with our names so we know whose string height is whose. 
If you are doing this project with older kids, you can teach them about length measurements and measuring tools (rulers/tape measures).
Remember to have fun!

Sunday, October 20, 2013

Getting Ready

The weekends sure flies by fast! Here's a sneak peek of this week's Little Big Moments pages 8 and 9...
I picked up this spool of red baker's twine at
Ben Franklin Crafts for $3.87, regular price $6.48!
If you don't have baker's twine, don't worry. You can use yarn or ribbon instead.
(I probably wouldn't have purchased this if I didn't have a 40% off coupon.)

Make sure to stay tuned to see what I will be using the baker's twine for!
:)

Wednesday, October 16, 2013

Little Big Moments #3

Are you ready for pages 6 and 7?
Here they are...


↓This is the smash book that I am working on with my daughter. The prompt is "outfit of the day." Normally if we are just going to stay home (meaning I clean/do housework, the baby plays/sleeps) I would just wear shorts or yoga pants and a tank top. My daughter usually just wears a onesie at home. Since my parents wanted to go to Costco we always love to tag along with them!

 
Some ideas...
  •  If your child is wearing a new outfit, why not add the tags to these pages instead of throwing them away? The tags will show what size clothes your child is wearing on this day!
  • I forgot to take a picture of our shoes, but that would be a cute picture!
Hope you have fun documenting what you guys wear! Whether you and your family are spending the day at home or you have special plans made, don't forget to always wear a SMILE! ;)

Tuesday, October 15, 2013

Our Pages 4 & 5

Here are pages 4 and 5 of my daughter and my Little Big Moments smash book!
 
(Sorry I used my iphone to take these pictures so they aren't very clear.)
For this set of pages I decided to print out my pictures because I was having a difficult time placing all the embellishments. Eveything is placed onto the pages with removable tape until I get the pictures professionally printed out. I usually use Shutterfly to print out my photos. My plan is to collect all the pictures I need for my smash book, then when Shutterfly has their 101 free prints offer (just pay for shipping) I will order all of them.

If you didn't get a chance to download this FREE printable, be sure to visit
my TeachersPayTeachers shop here:

A few of my thoughts..
  • I'm starting to understand the washi tape craze. Right now I only have 2 different tapes but I definetly plan on buying more!
  • I hate my handwriting!!! I wish I had nice and neat handwriting like my sister :( Anyway, does anyone have suggestions for a good, smooth journaling pen?? 
  •  I hope this project is useful and fun for you all! Sometimes I think I'm the only one that likes the projects I create.  :(
Hope you all are having a wonderful week! I really hope to have Pages 6 & 7 posted soon!

Friday, October 11, 2013

Little Big Moments #2

Hey everyone! Don't worry I didn't forget our smash book project. Since school is out on fall break this week, I was using my time to help my BFF with classroom stuff. We decorated her door for halloween, re-did her bulletin boards, and cleaned up a little. I give teachers so much credit for all their time and hard work!

I didn't have time to do pages 4 and 5 of my smash book/ scrapbook yet. But...since I have the printable ready I will just post it for now. You can go ahead and work on these pages if you are ready or you can print and cut out the embellishments and wait until I post my pages.

If you want to skip ahead of me, here is the FREE printable for our next two pages:
 PAGES 4 and 5:
The prompt this week is "What's for Breakfast?"
Document what you and your child ate for breakfast!You could even have lots of fun making breakfast together (don't forget to take pictures).  It would also be cool if you wrote down the recipe(s) that you used.

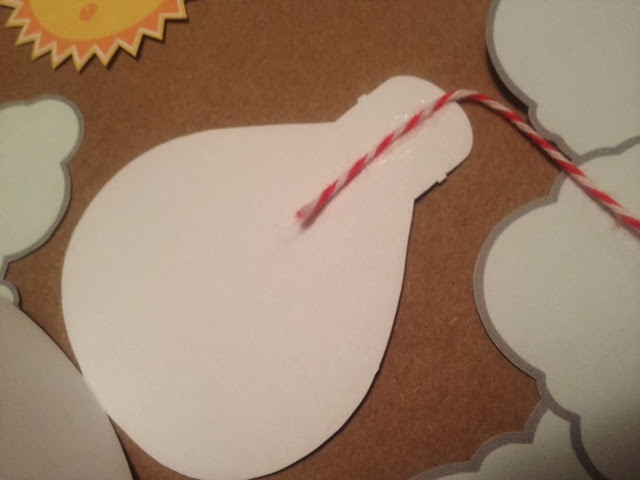
Here's a few embellishments that I have cut out:  

I was thinking while I was designing these embellishments and isn't it so nice that you don't have to go to the craft store and find papers and designs that all match? For me it is easier to design my own graphics because I can use matching colors, fonts, and graphics. In addition, the little city that I live in is so limited that it's hard for me to find cute scrapbooking materials. If you have any ideas for our Little Big Moments smash book, please leave them in a comment below!

Monday, October 7, 2013

Little Big Moments #1

Now that our cover is done, let's get to work on the inside of our smash book!
This is how it will work...I will have the printable at my TeachersPayTeachers shop. All you need to do is download it and cut it out.

Tips: 
  • Print the embellishment/label pages on label paper then it will be a sticker when you cut it out. No gluing :)
  • Save all the embellishments that you don't use for future pages.
  • Let your creativity run wild.
  • The best thing about smash books is that it doesn't have to be neat. Have fun!
So are your ready?

Download printables for pages 1-3 for FREE here:


PAGE 1:
I made the first page like a dedication page. Use this page to write a little introduction or about yourselves. Another idea is to write a note to your baby for them to read when they are older. 

You are probably wondering what the post-it note with the smiley face is for. Well I know I want to put pictures in my smash book of my daughter but I am waiting to collect all the pictures for my smash book so I can print them out all at one time. So for now, I will mark where a photo will go by using a smiley face post-it note. Tip: If you using this same picture method as  I am, make the post-it note the same size as the picture you will print. That way you will know that the photo will fit on your layout.


PAGES 2 & 3:
On these two pages lets document our hand prints! I painted a little bit of acrylic paint onto my daughter's hand with a paintbrush. The first print (on the left) was not so good. The second print (on the right) came out better. Tip: Have two papers ready.

I printed my hand print on the left page and my daughter's on the right page. Try to take pictures to document this fun activity. Decorate and journal as you wish.  Don't forget the date!

This is how my pages turned out:

See you all back here for pages 4 and 5!

Sunday, October 6, 2013

Let's Begin!!

So...this is my introduction to getting started!
First off, I will be trying to post a minimum of 2 pages each week. I will have each week's printables available at my TeachersPayTeachers.com. shop. (Its free to make an account.) I thought about waiting until I finished all the page templates but I figured that having you all do this project with me will motivate me to complete my book in a timely manner and also your feedback will help me make necessary changes. If I have time I will try to make some freebies to go along with the book.

A few of my thoughts...
  • I titled this project "Little Big Moments" because my daughter is "little" and some if the pages have simple topics/prompts such as what you ate for breakfast. The "big" comes from the idea that all these little everyday moments create my baby's life. Kind of like a lot of little pictures put together making a bigger picture. Also when you think so some of these milestones, to an adult it may be easy or simple, but from a child's perspective it's fun and the big highlight of their day!
  • This book is great for stay-at-home moms, Pre-K, or homeschooling.
  • My daughter is 18 months old so I use "toddler level" activities. You can modify or change it to fit your child's age.
  • I will post pictures of the book my daughter and I make. You can follow mine as an example or make it completely to your liking.
  • You can use a notebook or Smash Book, but I designed the pages to work with a half-size binder. I wanted to be able to move or add pages if needed.
  • I think a 12"x12" book is too bulky and will take more time to work on. Personally, I like mini albums :)
  • I tried to make the colors and themes gender neutral. Always remember that you can create and decorate your memory book the way you want to. I think it would be fun to let older kids design the pages and do their own journaling. 
  • Speaking of journaling, I'm not much of a writer (if you didn't notice). Some pages in my old scrapbook have empty spaces where I meant to put my journaling but I just never knew what to write. Due to my lack of writing talent, I will let the pictures and embellishments/labels do most of my narrating. 
  • Please respect my hard work by using this project for your personal use only.
The whole purpose is to have FUN and CHERISH the moments with your child while creating your "Little Big Moments" book!

So are you ready to get started?! Let's do this!

Materials You Will Need:
  • Half Binder 8.5" x 5.5" (got mine from Office Max)
  • Cardstock (I choose to use white coverstock and kraft cardstock)
  • Printer
  • Double-Sided Tape or Glue
  • Scissors
  • Hole Puncher
  • Washi Tape (optional) 
  • Crafting Embellishments (optional) 
I will list additional materials that will be need for specific pages in future blog posts.

The first step is to print out the cover for our Little Big Moments smash book. Download it for FREE!!!

 You will have to create a TeachersPayTeachers account, but don't worry it is free and
easy to sign up!


 Once you have the cover printed out, simply cut it out and slide it into the cover pockets of your binder.
↓ It should look similar to this ↓
That was easy, right? Now we are ready to fill our smash book with creative memories! Stay tuned for the instructions for page 1!
If you have any questions or comments please leave them in the comment section below!

For more fabulous crafting and DIY ideas, click HERE!
For more great ideas and projects to do with your kids, check out these blogs ↓
Funky Polkadot Giraffe
Homeschool Creations
Rainy Day Mum
A Bowl Full of Lemons

Friday, October 4, 2013

New Smashing Project!!

I have finally decided to put all my effort into making a smash book. I used to scrapbook a long, long time ago. Scrapbooking was my favorite hobby and when I was pregnant I was really excited to make a special scrapbook just for baby (I even bought baby paper designs and baby embellishments!) Sadly I don't have the time to craft like I thought I would. I discovered the concept of a smash book on Pinterest and thought I'm not creative enough to do that. While flipping through TV stations I came across Project Life on HSN and thought there are too many supplies and accessories that I need to purchase. After thinking (A LOT) I decided to create my own book which is a combination of scrapbooking, a keepsake album, a smash book, and Project Life!! Can't be that hard right? LOL!
This project is geared towards documenting life with a toddler or kids!! The main inspiration was having an activity that I could do with my daughter that is fun, educational, and sentimental. Being that I'm a stay-at-home mom, I'm always looking for toddler activities because she loves to just watch TV. I especially like the idea of making keepsake pages to show my daughter when she gets older.
I hope you are as excited as I am because I want you to join me!
I'm planning on doing a 30 page smash book. Each week I will post a new challenge/activity (2 page spread). Please be patient and understanding with me. This is my first time blogging a tutorial type project. Keep in mind that I'm no graphic designer, just a stay-at-home mother. But please feel free to help me by posting your thoughts, ideas, and comments!!

I will be posting this exciting new project very soon!

Wednesday, October 2, 2013

Learning Center Posters

I have seen a few weather charts on TeachersPayTeachers.com so I decided to create one as the start of making my daughter's "learning center." I know she is only 18 months old but I have learned that if I have an idea its best to do it when I have the time. There have been many occasions that I've either been too late to do a Pinterest idea or I'm rushing to make it so my stress level goes sky high. One occasion that always comes to mind is my daughter's first birthday party!! I though that starting to plan 5 months in advance would be fine...I was so wrong. I ended up stressing, rushing, and I had to give up some of my projects because I didn't have enough time! I think my new motto is: better too early, than never LOL.
So here is the weather chart I made:
 
I did laminate the chart. For now I just have tape on the arrows. Eventually I want to put magnets. I don't think she understands the concept of "weather" yet but when she does, I'm ready!Here in Hawaii we obviously don't have snow (well only on Mauna Kea).  I put it on the chart just because I want her to see that "snowy" is a category in weather.
Here is the second poster in my daughter's "learning center."
My fiance is an Air Force veteran and we both appreciate our freedom and our country. It's still a little early for my daughter to learn the Pledge of Allegiance. But the poster is ready for when the time comes!

Both of these printables are available on TeachersPayPeachers.com,
please visit my store here:

Hope everyone is having a wonderful Wednesday!