
First off, I will be trying to post a minimum of 2 pages each week. I will have each week's printables available at my TeachersPayTeachers.com. shop. (Its free to make an account.) I thought about waiting until I finished all the page templates but I figured that having you all do this project with me will motivate me to complete my book in a timely manner and also your feedback will help me make necessary changes. If I have time I will try to make some freebies to go along with the book.
A few of my thoughts...
- I titled this project "Little Big Moments" because my daughter is "little" and some if the pages have simple topics/prompts such as what you ate for breakfast. The "big" comes from the idea that all these little everyday moments create my baby's life. Kind of like a lot of little pictures put together making a bigger picture. Also when you think so some of these milestones, to an adult it may be easy or simple, but from a child's perspective it's fun and the big highlight of their day!
- This book is great for stay-at-home moms, Pre-K, or homeschooling.
- My daughter is 18 months old so I use "toddler level" activities. You can modify or change it to fit your child's age.
- I will post pictures of the book my daughter and I make. You can follow mine as an example or make it completely to your liking.
- You can use a notebook or Smash Book, but I designed the pages to work with a half-size binder. I wanted to be able to move or add pages if needed.
- I think a 12"x12" book is too bulky and will take more time to work on. Personally, I like mini albums :)
- I tried to make the colors and themes gender neutral. Always remember that you can create and decorate your memory book the way you want to. I think it would be fun to let older kids design the pages and do their own journaling.
- Speaking of journaling, I'm not much of a writer (if you didn't notice). Some pages in my old scrapbook have empty spaces where I meant to put my journaling but I just never knew what to write. Due to my lack of writing talent, I will let the pictures and embellishments/labels do most of my narrating.
- Please respect my hard work by using this project for your personal use only.
The whole purpose is to have FUN and CHERISH the moments with your child while creating your "Little Big Moments" book!
So are you ready to get started?! Let's do this!

So are you ready to get started?! Let's do this!
Materials You Will Need:
- Half Binder 8.5" x 5.5" (got mine from Office Max)
- Cardstock (I choose to use white coverstock and kraft cardstock)
- Printer
- Double-Sided Tape or Glue
- Scissors
- Hole Puncher
- Washi Tape (optional)
- Crafting Embellishments (optional)
I will list additional materials that will be need for specific pages in future blog posts.
The first step is to print out the cover for our Little Big Moments smash book. Download it for FREE!!!
 You will have to create a TeachersPayTeachers account, but don't worry it is free and
easy to sign up!
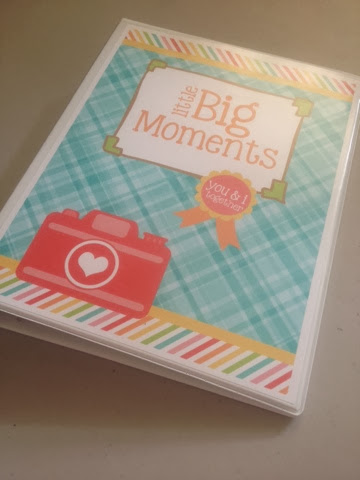
Once you have the cover printed out, simply cut it out and slide it into the cover pockets of your binder.
↓ It should look similar to this ↓


 That was easy, right? Now we are ready to fill our smash book with creative memories! Stay tuned for the instructions for page 1!
If you have any questions or comments please leave them in the comment section below!
For more fabulous crafting and DIY ideas, click HERE!
For more great ideas and projects to do with your kids, check out these blogs ↓
Funky Polkadot Giraffe
Homeschool Creations
Rainy Day Mum

The first step is to print out the cover for our Little Big Moments smash book. Download it for FREE!!!
easy to sign up!
Once you have the cover printed out, simply cut it out and slide it into the cover pockets of your binder.
↓ It should look similar to this ↓


If you have any questions or comments please leave them in the comment section below!
For more fabulous crafting and DIY ideas, click HERE!
For more great ideas and projects to do with your kids, check out these blogs ↓
Funky Polkadot Giraffe
Homeschool Creations
Rainy Day Mum
No comments:
Post a Comment